Communication using Serial communication board
1. Prepare supply source
Prepare power supply source as described in Power supply.
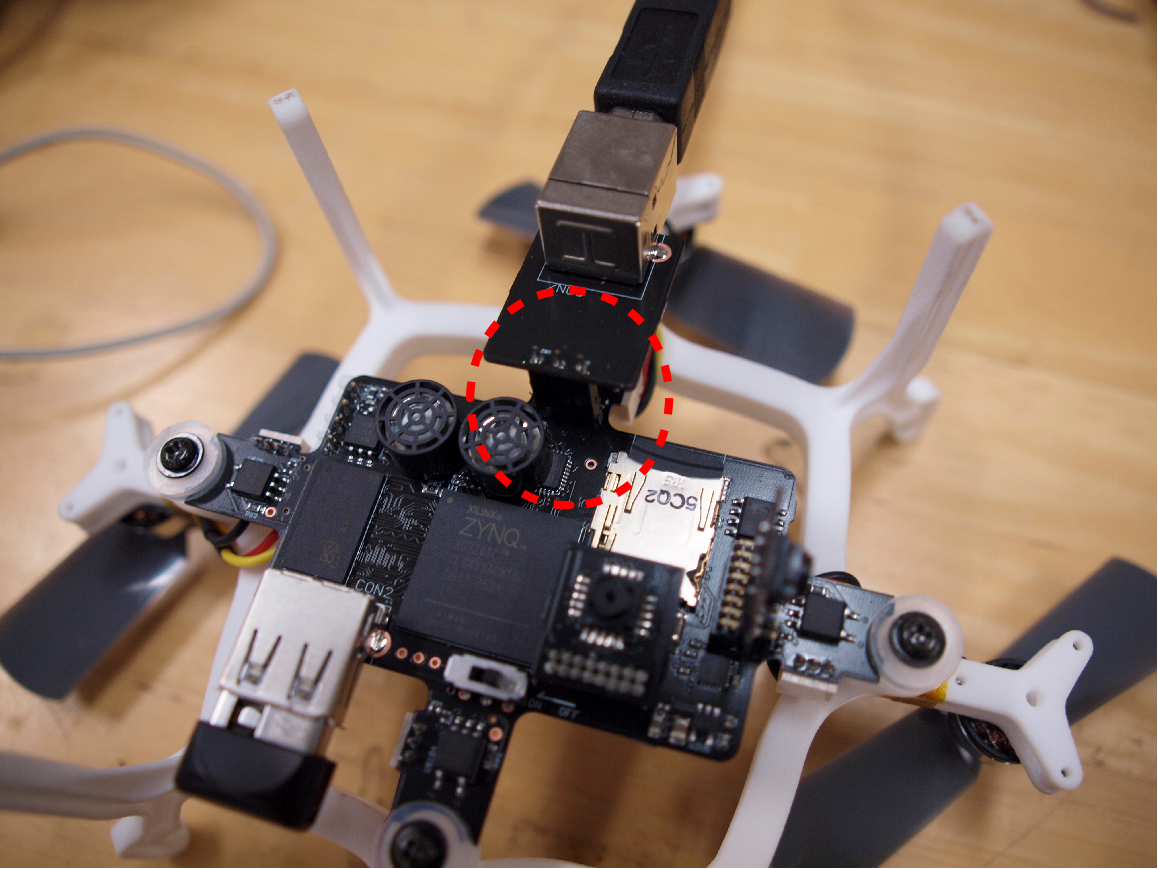
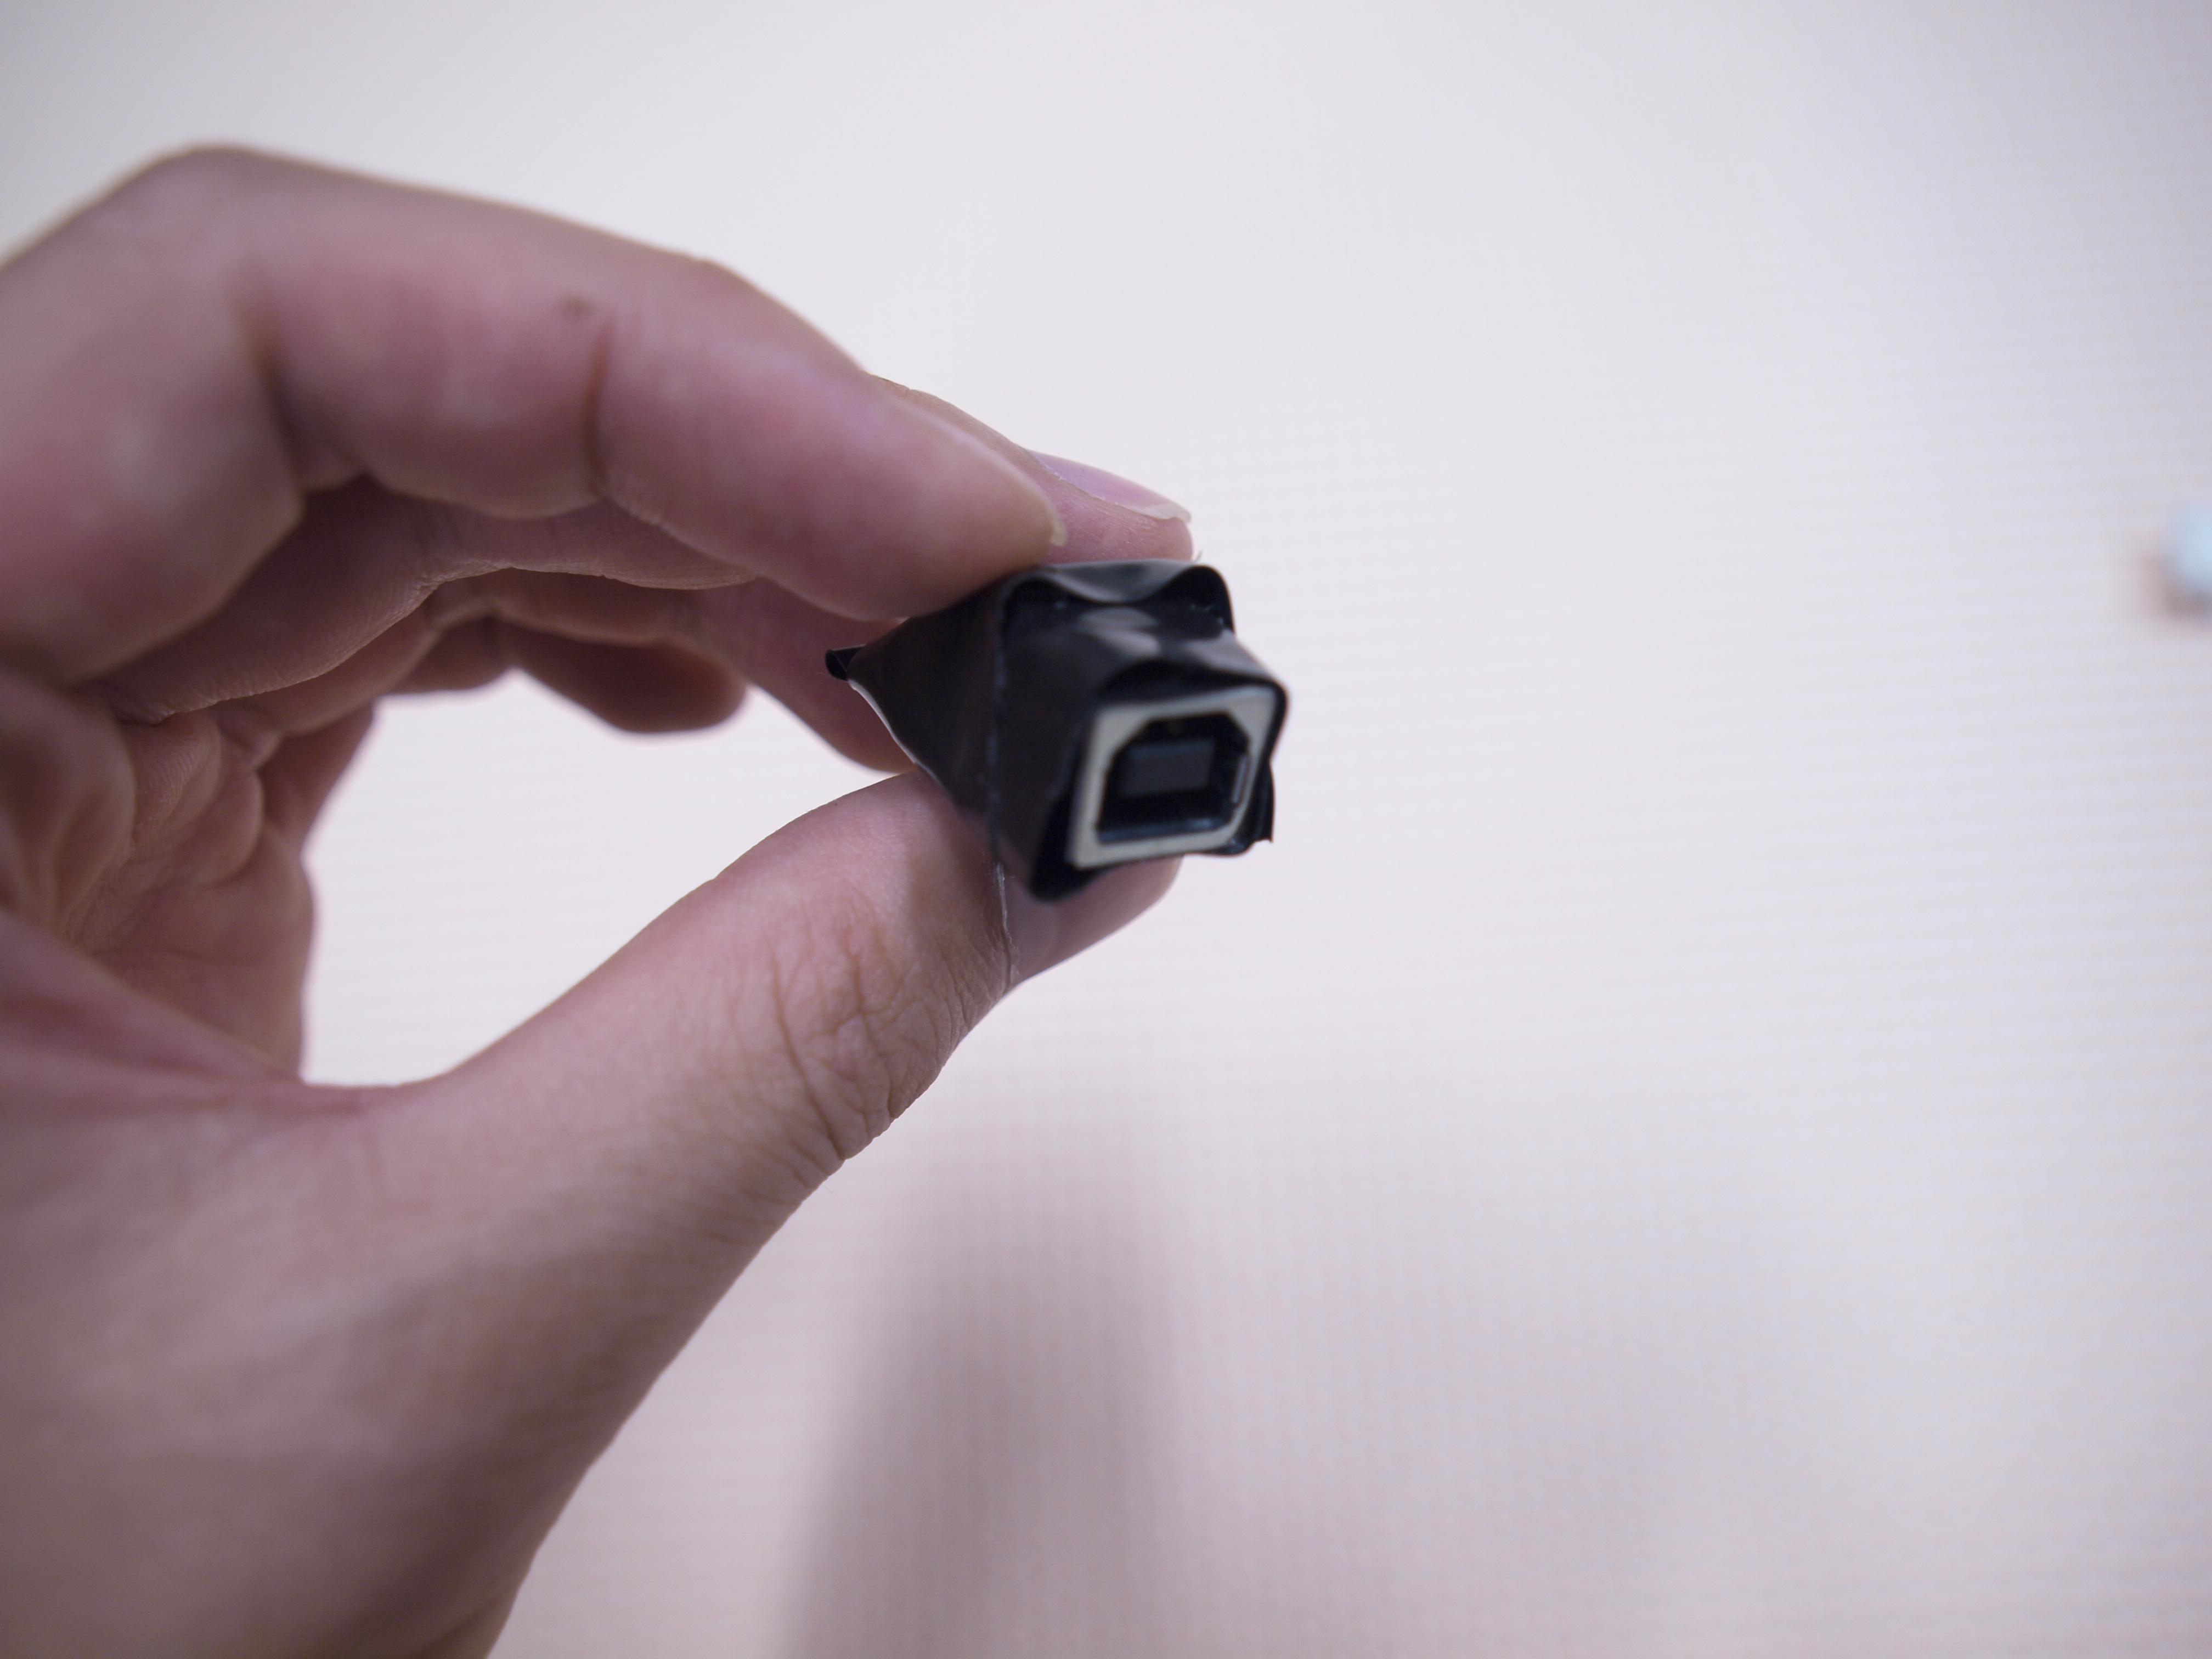
2. Setup physical connection
Attach the serial communication board to the main board as shown in Fig.1. It is strongly recommended to protect the serial communication board with tape to prevent accidental short circuit between those two boards as shown in Fig.2.
3. Setup software
If users use serial communication for the first time, install minicom as following command.
hostpc@ sudo apt-get install minicom
And download configuration file of minicom from Phenox Lab, and move to proper directory.
hostpc@ wget http://phenoxlab.com/static/minirc.dfl
hostpc@ sudo mv minirc.dfl /etc/minicom/
Please check that device name like /dev/ttyUSB{+number} and /dev/ttyACM{+number} appears when serial communication board(FT232RL) is connected to the main board. (There is no need to supply power to the main board in this stage.) And rewrite "minirc.dfl" according to the device name on user's environment.
hostpc@ sudo minicom
If the host-PC is not running Linux OS, the configurations of the serial communication software is baudrate = 230400 bps, 1 stop bit and no parity.
4. Run Phenox2
Set the power switch to on state checking LED0 and LED1. LED0 and LED1 will turn on for about 2 seconds, and then turn off when the main board finished loading boot loader (u-boot) successfully. If no messages are sent from Phenox2 in this stage, please check the setup of serial communication software.
Also if LED0 and LED1 continues on state, there may be problem of micro-SD card, and please refer to FAQ.
If host-PC gets messages from u-boot of Phenox2 (this situation happens when the main board receive input from host-PC before booting Linux.), please type run sdboot, and Phenox2 starts booting Linux.
Communication using WiFi module
Phenox2 becomes access point ("phenoxnet") after booting Linux automatically, and waits for ssh connection from host-PC.
-
Prepare power supply source as described in Power supply.
-
Insert WiFi module(WLI-UC-GNM) to USB port of Phenox2.
-
Set the power switch to on state checking LED0 and LED1. LED0 and LED1 will turn on for about 2 seconds, and then turn off when the main board finished loading boot loader (u-boot) successfully. If no messages are sent from Phenox2 in this stage, please check the setup of serial communication software.
Also if LED0 and LED1 continues on state, there may be problem of micro-SD card, and please refer to FAQ. -
Wait for about 20 seconds and check the LED of WiFi module. When blue LED of WiFi module starts blinking, Phenox2 finish booting Linux OS.
-
From the host-PC, find the wireless network access point. And connect to "phenoxnet" (SSID is "phenoxnet" and password is "phenoxnet").
-
From the host-PC, login to Phenox2 with following ssh command. The initial password is "root"
hostpc$ ssh root@192.168.2.1
Phenox2 accepts X11 forwarding by adding "-X" option to ssh command.
If users operate multiple Phenox2 at the same time, each SSID should be changed by modifying "setting/hostapd.conf"
Connection to the Internet
By default, Phenox2 establish "phenoxnet" to become access point itself using "hostapd". So if users want Phenox2 to connect to the Internet, users need to disable "hostapd" and set proper configuration to let Phenox2 to connect to another WiFi access point.
- Disable setting of Phenox2 to lauch "hostapd" daemon after booting Linux.
phenox# mv /etc/rc2.d/S20hostapd /etc/rc2.d/refuge
- Configure Phenox2 network to connect to another access point using "wpa_supplicant" to receive IP address from DHCP server.
We prepare example of configuration in ゙/root/setting/wlan-set-wli-uc.sh. Users need to modify this setting according to user's environment, and run this script as follows.
phenox# source /root/setting/wlan-set-wli-uc.sh
Please check the detail of setting from the Internet with keyword "wpa_supplicant".